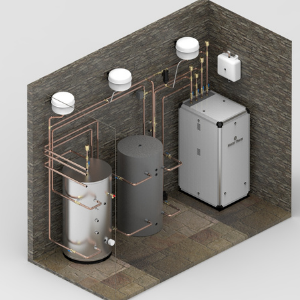
There are several stages involved with the installation of a ground source heat pump. Below we have provided insight into each one so that you can familiarise yourself with the process and learn what to expect when it comes to your own installation.

1. Funding Research
There are many grants available for the installation of renewable energy systems for homeowners. Eligibility of them can depend on many factors such as the type of system you are installing and your location. One of the most beneficial subsidies currently available is the Boiler Upgrade Scheme (BUS) which launched in May, 2022. You can easily check to see how much you could recieve and learn more about the grant on our BUS funding page.

2. Initial Enquiry
At the point of initial enquiry many experienced installers will be able to provide you with a ball-park figure using your property address or any site plans you have available. From this initial enquiry you can then determine if a heat pump is a viable option for your property and whether it’s within budget. You may want to visit our blog which provides approximate costs for both ground and air source heat pumps.
3. Site Visit
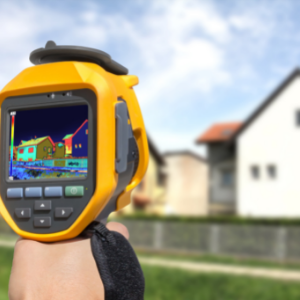
When you decide to progress your enquiry, a site visit will be arranged for information gathering purposes. Activities carried out during the site visit will include:
• Taking measurements
• Assessing building insulation (heat loss report)
• Checking the current heat distribution system e.g. radiators, underfloor heating etc
• Taking photos of key areas such as where the heat pump will be installed
• Scoping out accessibility for groundwork machinery such as a geothermal drill or excavators
A site visit can take around 1-2 hours depending on the size of the property.
4. Design and Specification
A big part of the design and specification for your install will be the ground collectors. They need to be correctly sized to ensure they collect enough energy from the ground, if they are too small the heat pump will need to work harder to meet heat demand which reduces system efficiency. Whilst you may have an idea of whether you’d prefer horizontal or vertical ground collectors, it may not be viable due to space restrictions or unsuitable ground conditions. You may also find it helpful to read our blog about how much space is required for a ground source heat pump. Whilst designing the system, we’ll also reference if sample boreholes have been drilled in the nearby area to determine if the ground is suitable. Using the measurements and/or any site plans provided, we’ll create a heat load report which will provide us with the required output for your heat pump. This will then be used to provide a full quote.

5. Contract
Once you’ve approved your quote you’ll be provided with a contract. This contract sets out the work that the installer is responsible for and may also include some elements you as the homeowner are responsible for e.g. ensuring there is access to a water supply if you're having boreholes and providing an ethernet connection for the heat pump for online connectivity. Once the quote has been approved, a project pack is created which includes system schematics and, if required, a mock-up of the plant room layout. The project pack is handed over to the operations team and one of our internal Project Managers will liaise with you about dates and timings for the installation and delivery of equipment such as the heat pump itself.
6. Ground Work Installation
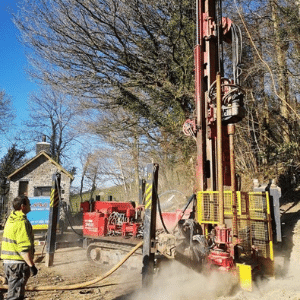
The larger the property the longer it’s likely to take to complete ground works as you’ll need larger ground collectors resulting in more boreholes or more trenches. It’s important to manage your expectations when it comes to ground works, it’s a messy operation. If you’re having trenches and the weather conditions are wet, the ground can quickly become very muddy – you’ll also need somewhere to put the earth while the ground collectors are installed. Drilling can also be messy and particularly noisy for the first few metres. It’s not uncommon to run into water deep below the surface and this will come back up out of the borehole. It takes around 1 day for the drill rig to arrive on site and get set up, then around 1 day per borehole. We recommend factoring 5 to 10 days into your schedule for ground works. You can read more about what’s involve with borehole drilling with our customer guide.
7. Plant Room Installation
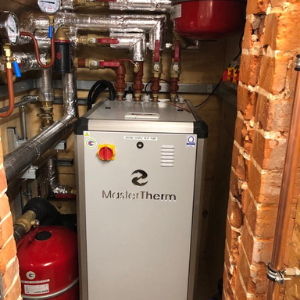
Work will begin on your plant room (the space where your heat pump is installed). Depending on the size of your system and available space in your house areas for this could include the garage, utility room, storage cupboard or even the space underneath the stairs. Even though heat pumps are remarkably quiet, we do recommend installing them away from sleeping areas for maximum comfort. Your plant room install would include items such the heat pump, hot water cylinder, buffer tank (if required) and expansion valves. Most plant rooms can be installed within 5 working days, but again this depends on the system size.
8. Heat Distribution System Installation
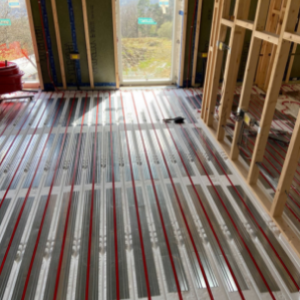
Depending on whether your project is a newbuild or a retrofit, can mean that this step can occur before the plant room install. If you have a newbuild it’s more efficient to work with the construction company to install underfloor heating, radiators etc as they work through the property – before any decorative elements are added. The heat distribution system can take 5-10 working days for a new build and slightly longer on a retrofit on average as the previous system will also need to be removed. It’s worth noting that you may be able to continue using your existing radiators. This will be advised on during your system design stage.
9. Sign off, Commission and Handover
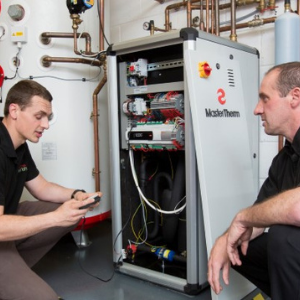
Once the system is fully installed, the sign off and commissioning stage begins. This involves checking that the system is correctly installed and that you are gaining maximum efficiency from your heating and hot water products. Checks will include the heating system pressure and brine loop pressure as well as listing your system set points and important information that may be needed for future services and maintenance. Once the engineer has completed the commissioning paperwork, this will also be sent to MCS who will provide you with an MCS registration number – this will be needed for the Renewable Heat Incentive application if you’re planning to apply for it.

10. Managing your system
We’d recommend downloading the MasterTherm app for easy access to control your heat pump on the go. If you don’t have one already you may want to install a smart meter for your electricity and consider switching to a variable electricity tariff such as those provided by Octopus Energy and Bulb – these will enable you to maximise savings on your monthly energy bill as your heat pump will automatically optimise to run during lower cost periods.
 Facebook
 LinkedIn
 Twitter


